Viewing entries in
Eats

Sweet Laurel's Double Chocolate Brownies

Comment

Sweet Laurel's Double Chocolate Brownies

These brownies make an almost weekly debut in our home. Gooey, chocolatey, and oh so so decadently delicious. Everyone who tastes them can’t believe that they not only aren’t bad for you, but are gluten free and actually healthy to boot. Miraculously, that’s how everything in the Sweet Laurel Cookbook is! Having been diagnosed with an autoimmune disease called lupus (more on that in an upcoming post) in the spring of 2018 after having Chloé, I’m so thankful for simple and easy recipes that won’t exacerbate my symptoms, and that I feel good giving my family knowing they aren’t full of garbage. All the ingredients for these babies can actually be found at Costco, so go stock up and make these brownies as soon as you can, I promise you won’t regret it! And if you want to spring for the Sweet Laurel Cookbook too, I highly recommend it. The cakes and cookies are even better than any gluten-containing dessert I’ve had, and the snickerdoodles are another Griffo house favorite.

Recipe shared with permission from Sweet Laurel

Makes 16 brownies

2 cups almond butter
2 large eggs
1 1/4 cups maple syrup
1 tablespoon vanilla extract
1/2 cup 100% unsweetened cacao powder
1 teaspoon baking soda
1/2 teaspoon himalayan pink salt
1 cup vegan chocolate chips (the kirkland brand at costco are vegan!)

Preheat oven to 350ºF. Line an 8x8 inch pan with parchment paper for easy removal, letting it hang over the sides (this is key because the brownies are so gooey there is no other way to extricate them from the pan).

In the bowl of a stand mixer fitted with the paddle attachment, mix the almond butter on medium speed, then mix in the eggs one at a time, maple syrup, and vanilla.

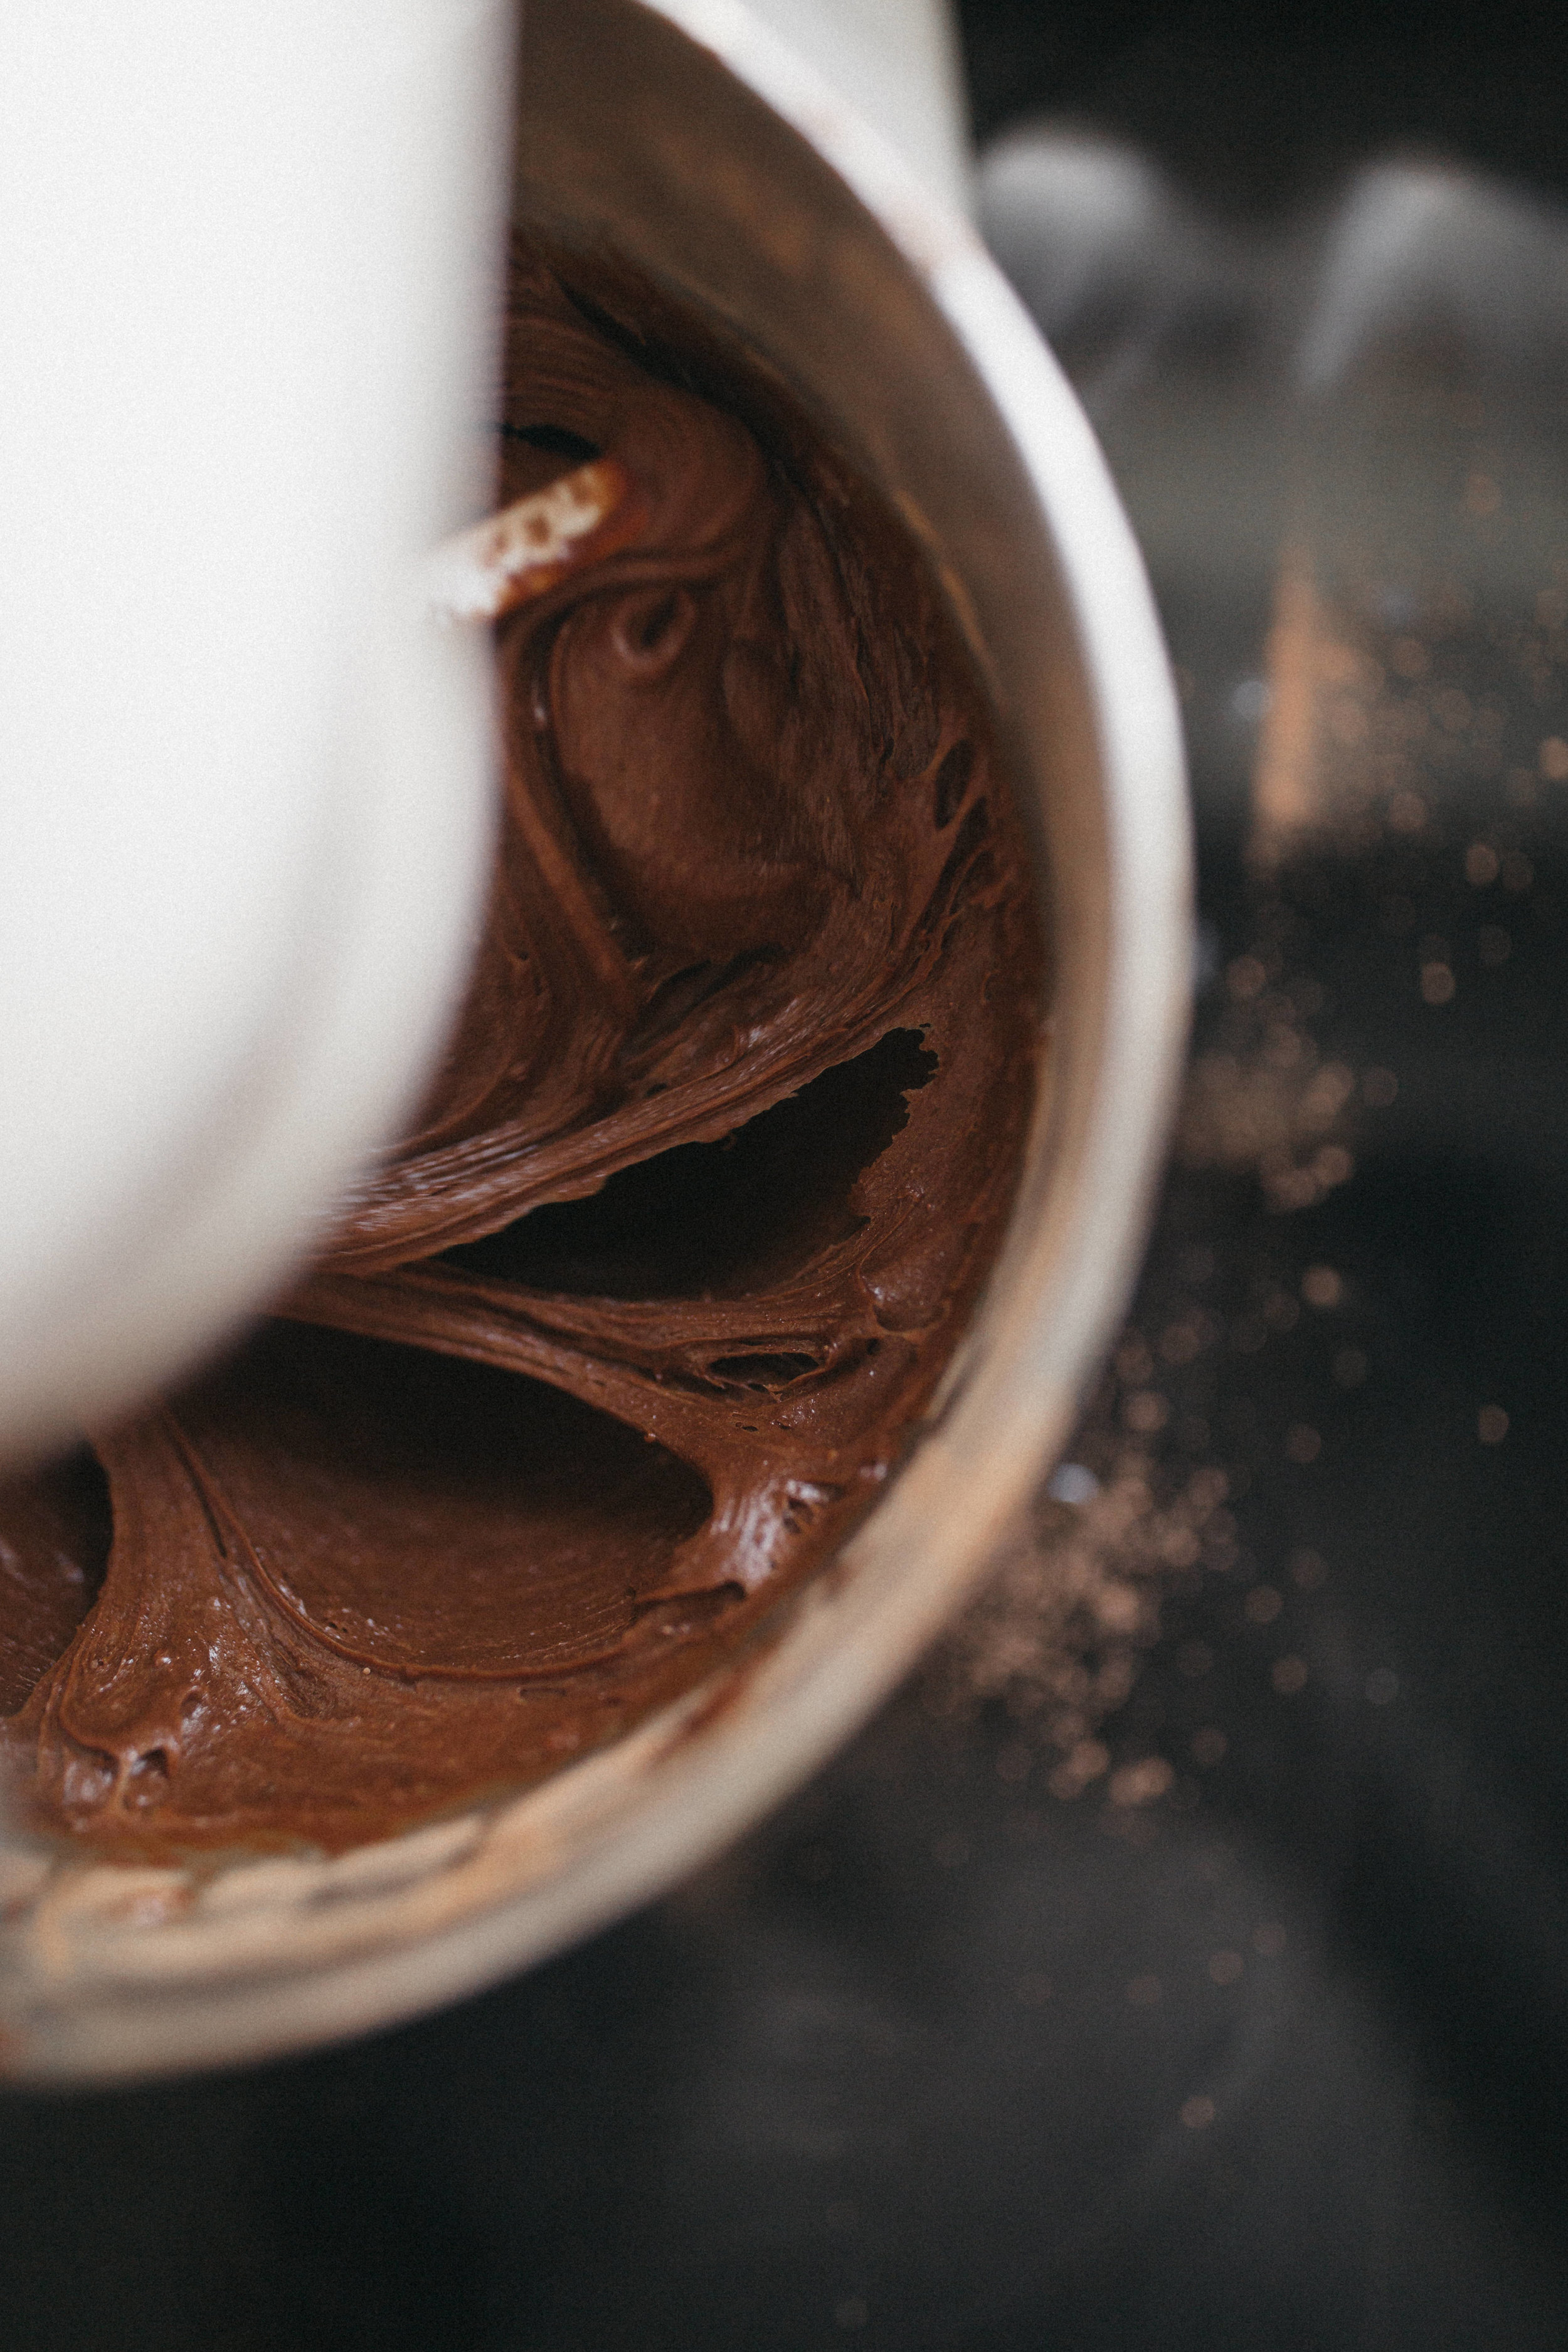
In a medium bowl whisk together the cacao powder, baking soda, and salt. A little at a time, add the dry ingredients into the wet in the stand mixer, stirring until a dough comes together. Stir in about three-fourths of the chocolate chips, the pour and spread the batter into the parchment lined pan.

Sprinkle the remaining chocolate chips over the top of the brownies and bake for 35 to 40 minutes, until the edges have set and they are still a bit fudgy in the center, then remove from the oven. Holding the sides of the parchment, lift the brownies in one piece from then pan and allow to cool somewhat before cutting into squares (the longer they cool, the more cleanly they will cut, but the waiting is tough let me tell you). Store in a sealed container for up to a week, or in the freezer indefinitely.

Brownies (1 of 16).jpg
Brownies (4 of 16).jpg
Brownies (5 of 16).jpg
Brownies (13 of 16).jpg
Brownies (16 of 16).jpg

Comment

Fig + Rose Smoothie

Comment

Fig + Rose Smoothie

Figs are one of my absolute favorite fruits. Their in season window is short, but oh so sweet. Nothing is more delicious to me than a fresh fig bursting with flavor (except maybe plain dried mangoes because they are my favorite addiction), but since they have such a short window fresh figs aren't available much of the time.

Enter frozen figs. These babies can be enjoyed year round in a variety of ways, but this is one of the easiest and quickest I've found. No waiting for them to thaw, or soaking them in bourbon (add that to your old fashioned to make it extra fancy). Simply blend and consume.

This smoothie is made extra fancy with the addition of rosewater, which has numerous skin and health benefits. Rosewater is rich in flavonoids, anti-oxidants, tannins and essential vitamins like A, C, D, E and B3. It enhances moods, helps relieve stress and depression, improves skin texture, and is even said to have anti-aging properties. Growing up with Iranian neighbors, I fell in love with it's unique taste at a young age, and love it even more today. If you've never had it before though, I recommend adding it a little bit at a time so you aren't overwhelmed by the flavor. It can definitely be an acquired taste! Also feel free to go heavier on the cardamom. I'm not a huge fan of the flavor so I usually go easy, but you do you!

Serves 2

2 frozen bananas

4 large frozen figs

2 handfuls almonds

2 shakes cinnamon

2 shakes cardamom

1 1/2 teaspoons rosewater (I used this kind, given to me by an Iranian friend)

2 cups coconut milk

Add all ingredients to blender in the order listed. Blend until smooth. Divide into two cups. Enjoy!

Comment

Crispy Roast Chicken + Salsa Verde

Comment

Crispy Roast Chicken + Salsa Verde

Crispy Roast Chicken + Salsa Verde (3 of 56).jpg
Crispy Roast Chicken + Salsa Verde (12 of 56).jpg

As the days get shorter, the nights get longer, and the weather gets colder, not much is more comforting and cozy than delicious smells filling the house while something equally as delicious cooks. While the weather is finally cool enough to not suffer while standing over a stove and cooking, sometimes it's so nice to make something that doesn't take a whole lot of work. Something that once the chopping and assembling is done, can (mostly) cook itself while you sit on the couch with a good book. This is one of those kinds of meals.

Notes:

I always use brined chicken to keep it extra moist and juicy, and serve it alongside brown rice to keep the meal filling but healthy.

This recipe is my riff on Gwyneth Paltrow's "Super Crispy Roast Chicken" (from her book "It's All Good"), and Kimberly Hasselbrink's "Salsa Verde" (from her book "Vibrant Food").

Serves 4

Roast Chicken

High quality, free range + organic whole chicken

Coarse sea salt

Fresh ground black pepper

Extra virgin olive oil

Fresh thyme

2 lemons, quartered

1 red onion, cut into eight wedges

1 yellow onion, cut into eight wedges

1 shallot, thinly sliced rounds

Salsa Verde

1 1/2 cup finely chopped fresh parsley

1/4 cup extra virgin olive oil

2 tablespoons chopped capers

1/4 teaspoon minced garlic

1 lemon, zest + juice

1/4 teaspoon salt

Crispy Roast Chicken + Salsa Verde (23 of 56).jpg
Crispy Roast Chicken + Salsa Verde (26 of 56).jpg
Crispy Roast Chicken + Salsa Verde (34 of 56).jpg
Crispy Roast Chicken + Salsa Verde (39 of 56).jpg
Crispy Roast Chicken + Salsa Verde (34 of 56).jpg

Preheat the oven to 425°F.

Rinse and dry the chicken. Sprinkle generous amounts of salt and pepper inside the cavity, then rub the entire chicken with olive oil. Sprinkle salt and pepper on the underside of the chicken, and then place it breast side up in a roasting dish. Stuff the cavity with half the lemon, some fresh thyme sprigs, and slices of the onions. Generously sprinkle the top with salt and pepper. Nestle the rest of the onion slices, along the the rest of the lemon, the thinly sliced shallot, and more sprigs of the thyme around the chicken. Sprinkle the top of the chicken with fresh thyme leaves, and finish with a quick drizzle of the olive oil.

Roast the chicken for 1 to 1 1/2hours, basting every 15-30 minutes with the juices that accumulate in the pan. 

While the chicken cooks, make the salsa verde by combining the parsley, olive oil, capers, garlic, salt, lemon zest and juice in a small bowl.

The chicken thigh should register at least 165°F on a thermometer, but you can let it get to 180°F just to be sure it’s completely cooked through. Let the chicken rest for 10 minutes before carving.

Serve the chicken alongside the roasted onions, and with a drizzle of the pan juices. Finish with the salsa verde. Enjoy!

Crispy Roast Chicken + Salsa Verde (52 of 56).jpg

Comment

Pizza Margherita

1 Comment

Pizza Margherita

My husband Mark, is from Italian heritage. He not only loves Pizza Margherita, but he uses it as a measuring rod as to whether an Italian restaurant is actually good or not. Do they care enough to not cut corners on the simplest pizza on the menu? If the Margherita is good, it is likely the rest of the menu will be as well. To celebrate his love of Pizza Margherita, and to show him a little love, I threw together a quick take on his favorite. And it may have just rocked his world.

I made this pizza pretty simply, with my favorite pre made dough, and some pre made pizza sauce that I fancied up with some herbs and spices. But that doesn't mean that you can't make your own dough or sauce. If you have that kind of time, I say go for it. The pizza will be even better.

Notes: I own a pizza stone, and I have to say it makes a huge difference in the way the bottom of the pizza turns out crispy, and not soggy. I highly recommend investing in a good one.

Makes enough for 2-3

Pizza dough

I used Trader Joe's whole wheat pizza dough

Pizza or tomato sauce

I used Whole Foods Pizza Sauce and added my own spices

4 small burrata

or 2-3 normal sized

Vegans can use a mozzarella alternative

Handful of fresh basil

leaves only

Handful of fresh oregano

leaves only

Handful of fresh thyme

leaves only

Begin by preheating the oven to 480°F. If you are using a pizza stone, allow it to preheat in the oven. Form the pizza dough into a ball, and allow it to sit out while the oven pre heats.

When the oven is ready, take the ball and roll it out flat or toss it until it flattens. Make sure the rolled dough is quite thin, or it will become too thick as it bakes. Place the rolled dough on a sheet of parchment paper, and transfer to the oven for 3-5 minutes, to allow the crust to firm up.

Remove the pizza crust from the oven, and spread with a thin layer of pizza sauce. Not too much, or the pizza will be soggy. Add the burrata to the pizza. Place in oven, and bake for 10-15 minutes or until crust is golden brown, the center of the pizza is bubbling, and the burrata is running.

Remove the pizza from the oven, and scatter the top with the fresh herbs. Cut pizza, and serve immediately. Enjoy!

1 Comment